Blog posts by Geekyboy – Adam Culp

  • Setting larger terminal size when launching

    Have you ever noticed that when opening a terminal screen in Linux it is very small? Who can work like that? AND in order to do anything I need to drag the corner of the window to make it larger, which is time consuming and drives me crazy because I am opening and closing my terminal screens many times each day.

    So, here is a screenshot of how small the terminal screen is when initially launched:

    Tiny terminal window on launch

    The fix is very simple.  Right click on the launcher for terminal and select “Properties”.  When that dialog opens you are going to edit the Command to set the geometry of the window to be BIGGER.  I personally like my terminal to be 175×50, you can vary the size as you wish.

    So, here is the new Command: (175 is the width and 50 is the height)

    gnome-terminal --geometry 175x50

    Now when my terminal screen opens it is much better:

    Bigger Terminal Size

    Enjoy!

  • Install APC (alternative PHP cache) on RedHat RHEL 5

    After attending php|tek 2009 I decided it was finally time for me to play with APC, and at least install it on a server to see what all of the excitement is about. After all, if it is good enough for Facebook it must be pretty beneficial, right?

    According to the documentation the following command is what it takes to install:

    pecl install apc
    

    However, then I tried this I quickly received an error stating “phpize: command not found”. So after a little searching I discovered that I needed to install php-devel.i386 to enable pear to install packages. (You may also need to install autoconf, automake and libtool to do phpize. I must have already had them installed.)

    sudo yum install php-devel.i386
    

    Note: I used sudo, but you can also use su to change to the root user and then run the command as root.

    Now after installing that, which also installed a couple of dependencies and updated a couple of other applications, I figured I would be all set. To the contrary I tried the install apc command again and I received one prompt asking:

    Use apxs to set compile flags (if using APC with Apache)? [yes]:
    

    I received a new error after answering “yes” :

    Sorry, I was not able to successfully run APXS.  Possible reasons:
    
    1.  Perl is not installed;
    2.  Apache was not compiled with DSO support (--enable-module=so);
    3.  'apxs' is not in your path.  Try to use --with-apxs=/path/to/apxs
    The output of apxs follows
    /tmp/tmpArfGXr/APC-3.0.10/configure: line 3196: apxs: command not found
    configure: error: Aborting
    ERROR: `/tmp/tmpArfGXr/APC-3.0.10/configure --enable-apc-mmap=yes
    --with-apxs' failed
    

    After a few minutes of searching I found a post somewhere that informed me that httpd-devel.i386 also needed to be installed.

    sudo yum install httpd-devel.i386
    

    Once the package installed, along with a few more dependencies and updates, I was then ready to try again. This time all went well, and APC was installed.

    One final step was to activate it in the php.ini file. I added the following:

    extension=apc.so
    apc.enabled = On
    

    Next I was ready to restart Apache and see APC in action:

    sudo /etc/init.d/httpd restart
    

    After creating a quick phpinfo() call I could now see that the APC module was indeed active. Once I copied the apc.php file that comes with the APC install files into a web accessible directory (preferably password protected) I was clearly able to see stats associated with APC.

    There is much more you can do with APC settings, etc. However, that is another story for another time. Here are a couple of links to help get you started though.
    C7y Tutorial
    Pecl page
  • Installing mhash on RHEL 4 and PHP 4.3.9

    Recently I had a customer that was receiving errors from an Authorize.Net web submit form in their shopping cart. The error simply stated:

    “The gateway no longer supports the requested method of integration.”

    While doing some digging I found that they were using a very old web submit method that Authorize.Net no longer supported. There were two ways to fix the problem:

    1. Change to AIM method of submission, which required an SSL certificate that the client did not have.
    2. Change to SIM method of submission, which required either PHP 5.1.2 installed to use the hash_hmac function, or for PHP 4.3.9 it required that mhash be installed on the server.

    Since the client did not want to spend the extra cash for the SSL certificate, and I could not install PHP 5.1.2 because I had too many other clients on the server that were not ready for the upgrade, I decided to do some searching for a way to install mhash.

    It turned out that the Red Hat repositories did not carry php-mhash for RHEL 4, so this meant I needed to look in other areas. After reading many different blog and BB postings saying that it required an install, then a recompile of PHP I started to get a little worried. I did not look forward to recompiling PHP.

    Finally I found some posts that brought a ray of hope. There are RPMs available to install php-mhash without the PHP recompile, but it required that libmhash be installed first. Here are the steps I followed:

    • I went to http://dag.wieers.com/packages/libmhash/ and downloaded the newest version of libmhash for my server.
    • Then I installed using the following to satisfy dependencies of mhash:
      rpm -iv libmhash-0.9.1-1.rhel3.dag.i386.rpm
    • Next I downloaded the php-mhash by using:
      wget ftp://rpmfind.net/linux/sourceforge/p/ph/phprpms/php-mhash-4.3.2-19.ent.2.i386.rpm
    • I followed that by installing it using:
      rpm -iv php-mhash-4.3.2-19.ent.2.i386.rpm

    After following those steps I created a phpinfo script to see that everything went well:


    I could now plainly see that mhash was installed perfectly, and with further tests I confirmed it was working.

  • Ubuntu can mount ISO files, and IMG files after converting them to ISO

    Today I needed to create an OEM Microsoft Office 2007 CD and found that I could download the disks directly from the Microsoft site. However, the files that I downloaded were in IMG format. At first I was puzzled, but quickly (via Google) found out that they were essentially ISO files. However, I did not quickly find anything in Ubuntu that would burn an IMG to disk.
    Diligent searching finally revealed that while there were not really ways to burn an IMG to disk, or mount an IMG file directly, there is a tool called ccd2iso that converts the IMG to ISO format.

    First I had to install the ccd2iso package via Synaptic package manager, or I could have used ‘sudo apt install ccd2iso’.

    After installing this I could simply run the following command from terminal:

    ccd2iso myfile.img myfile.iso
    

    The same methods can be used for other image type files:
    mdf2iso -> myfile.mdf
    nrg2iso -> myfile.nrg

    Now I have a regular iso file that can be used to serve our purposes by burning to disk or mounting:

    sudo mount -o loop myfile.iso mountname
    
    or
    
    sudo mount -o loop -t iso9660 myfile.iso mountname
    

    The .nrg files can also be mounted in this manner without converting to ISO by using:

    sudo mount -o loop,offset=307200 myfile.nrg mountname
    

    NOTE: if this doesn’t work and you get an error like: “Unrecognized sector mode (0) at sector 0!” it may be due to the limitations of the ccd2iso. In my case the MS Office disk had multiple sessions, and I could not convert it to ISO.

    Another post I found on Ubuntuforums said to try the following:

    growisofs -dvd-compat -Z /dev/dvdrw=dvd.img
    

    Where /dev/dvdrw is your dvd/cd burner.

    FOLLOWUP:
    The IMG file I had from Microsoft was a multi-session disk so I was not able to use the steps above. However, when I simply changed the file extension to ‘.iso’ it worked fine. There seems to be very little difference between IMG and ISO.

  • Finding a text string inside a file on a Linux server

    It never fails that I find myself hunting for a way to search for a particular text string in files.  Usually I know the file, but often times I also find that I am completely unsure what file contains the string.  Or while I am writting some code I need to find how many files use a certain function.

    I know that using grep is the best way to search on a Linux server, so I start there.  Here is the command syntax:

    grep "text string to search for" /path/to/search
    

    Examples
    To search for a string called “myFunction” in all text files located in /var/www/html/*.php use:

    grep "myFunction" /var/www/html/*.php
    

    To search recursively in all sub-directories you would alter the command by adding the -r option:

    grep -r "myFunction" /var/www/html
    

    Now you have probably noticed that grep prints out the matching lines containing your string, but you may also need the filenames of the files containing the string instead. You can use the -H option to narrow the output the filename followed by the line containing your search string, like so:

    grep -H -r "myFunction" /var/www/html
    

    This would output something like:

    ...
    your_file.php: line containing myFunction
    ..
    

    To print out just the filename you can cut command like this to clean the output further: (Note the one after the f, not an L)

    grep -H -r "myFunction" /var/www/html | cut -d: -f1
    

    The new cleaner out put would be like:

    ...
    your_file.php
    ...
    
  • Backup files from Linux to a Windows server

    Ok, this may be my last disaster recovery and backup blog for a long time. As you can probably tell from the title this blog entry is all about keeping backup strategies as cheap as possible.

    My strategy is to backup all of my Windows and Linux servers to one central Windows server that is running a Tivoli backup agent. All of my servers are hosted elsewhere, and since it costs $99.00 per server to backup I am getting the most for my money by only backing a single server to tape/SAN. However that single server carries all of the files that need to be remotely backed up to tape/SAN.

    My earlier posts show how to backup the Windows servers:
    Windows backup bat script using xcopy

    Also, how to backup the Windows Domain Controller:
    Backup Windows Domain Controller using NTBACKUP via cmd

    And I also showed how to backup a Linux server to a local file:
    Linux backup using CRON to local directory

    Now I will show how I moved the files backed up on the Linux servers to the Windows server prior to tape/SAN backup. I have decided to use Samba and mount a directory pointing to a shared folder on the Windows server. Lets begin:
    (more…)

  • Linux backup using CRON to local directory

    As many have pointed out I am on a backup and disaster recovery kick lately. Some would say that it is about time, others are simply glad to see that data is now being backed up. I have found that it is easiest to zip up files on a local machine prior to moving them to a final destination. So lets get started:

    I have multiple Linux servers with many websites on each, as well as database. So I created a script that simply tar’s the files, then gzips them with the date in the filename for archiving.

    Here is the file named ‘backupall.sh’ that I save in a place reachable by the user I will use to schedule this cronjob:

    #!/bin/sh
    date
    echo "############### Backing up files on the system... ###############"
    
    backupfilename=server_file_backup_`date '+%Y-%m-%d'`
    
    echo "----- First do the sql by deleting the old file and dumping the current data -----"
    rm -f /tmp/backup.sql
    mysqldump --user=mysqluser --password=password --all-databases --add-drop-table > /tmp/backup.sql
    
    echo "----- Now tar, then zip up all files to be saved -----"
    tar cvf /directory/to/store/file/${backupfilename}.tar /home/* /var/www/html/* /usr/local/svn/* /etc/php.ini /etc/httpd/conf/httpd.conf /tmp/backup.sql /var/trac/*
    gzip /directory/to/store/file/${backupfilename}.tar
    rm /directory/to/store/file/${backupfilename}.tar
    chmod 666 /directory/to/store/file/${backupfilename}.tar.gz
    
    echo "############### Completed backing up system... ###############"
    date
    

    (more…)

  • Backup Windows Domain Controller using NTBACKUP via cmd

    Backing up your servers for disaster recovery these days much include your Domain Controller if you are utilizing a Windows Active Directory to manage your users. To do this is easy using a tool that comes installed on all Windows servers called NTBACKUP. Of course you can launch the GUI by entering NTBACKUP from the run or command line. However, this does not make automated backup work very well. So here is the .bat file that I use to execute it via Windows Scheduled tasks:

    @echo off
    :: variables
    set logfile=D:\backup_log_file.txt
    
    echo %Date% # # # Backing up system state containing: local Registry, COM+ Class Registration Database, System Boot Files, Certificates(if certificate server installed), Cluster database(if installed), NTDS.DIT, and SYSVOL folder >> %logfile%
    ntbackup backup systemstate /J "System State Backup Job" /F "D:\system_state_backup.bkf" >> %logfile%
    
    echo %Date% Backup Completed! >> %logfile%
    

    (NOTE: I am doing this backup via an internal network and using a user account that exists on both systems. Security may dictate that you handle this differently based on your circumstances.)

    After the file is executed by Windows Scheduled Tasks you will then be left with a file that is ready to backup somewhere. I do this by making a copy to another server by using the methods covered in a previous blog post at Windows backup bat script using xcopy.

  • Windows backup bat script using xcopy

    Recently I had the need to create a bat script that could be executed by the Windows Scheduled Tasks. The purpose was to copy files from one server to another as a cheap way to backup files created by MSSQL backing up the databases. Here is the .bat file contents (cleaned up to protect sensitive data):

    @echo
    :: variables
    set sourcedrive=D:\
    set backupdrive=\\servername\d$
    set backupcmd=xcopy /s /c /d /e /h /i /r /y
    
    echo # # # Moving files
    %backupcmd% "%sourcedrive%\directory_to_backup" "%backupdrive%\directory_to_store_backup"
    
    echo # # Moveing Complete!
    

    (NOTE: I am doing this backup via an internal network and using a user account that exists on both systems. Security may dictate that you handle this differently based on your circumstances.)

    Notice that for the backupdrive I am calling another Windows server and using the d$. This would require that the Windows Scheduled Task be executed using a user that is trusted on both machines. Also you could specify a local directory on the same server if you did not need to copy the files to another server.
    (more…)

  • UltraEdit on Linux and MAC…finally ! ! !

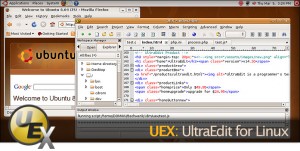
    I received an email that just made my day. It was the announcement that UltraEdit will finally be available on Linux! The screenshots show it on Ubuntu, and they say there will also be a version for MAC. (Initially it will only be packaged for Ubuntu with tar balls for the others, but soon there will also be packages for Suse, and Redhat) And it is very close to release, supposedly Alpha in April 2009.

    UltraEdit on Ubuntu
    UltraEdit on Ubuntu

    You can find out more on the Blog Post, or you can see the Formal Product Page.